Summary:
Now that you’ve watched the video, you know it doesn’t take a lot of fancy resources to begin a garden at home! Natalie showed that you can save money and be kind to the planet by reusing things that you might have chosen to compost or recycle otherwise.
Know-It-All
1. Why is the order of “reduce, reuse, and recycle” important?
2. Why is it a good idea to reuse or repurpose an item you already have at home, instead of buying something new?
3. Do you have anything in your home that has been repurposed? What was it used for at first, and what is it now? (Ex. An old t-shirt as a rag.) If you can’t find anything like that, find an item at home that isn’t serving its original purpose and give it new life (hint, there are lots of ideas in the “Try It” section)!
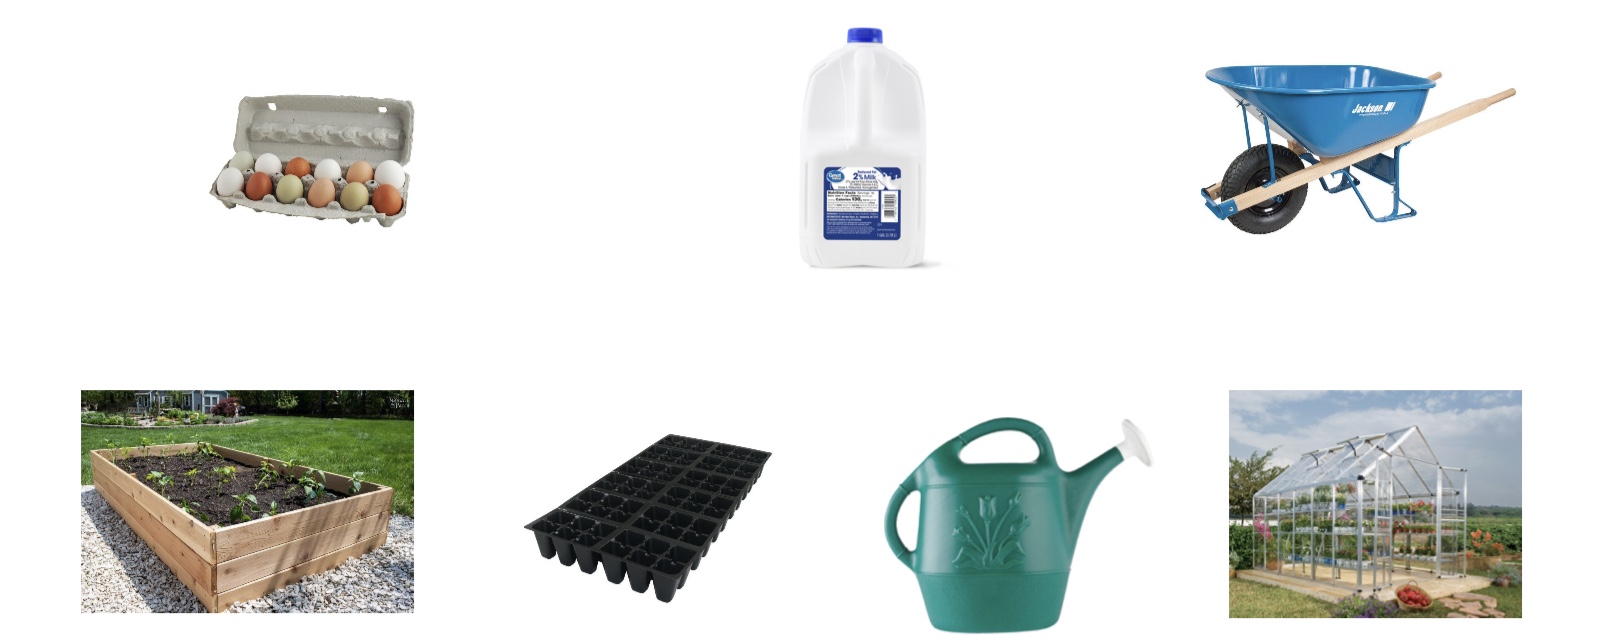
4. You saw quite a few household items transform into tools used in the garden. Draw lines to match the recycled item to the gardening tool it could be transformed into! (Some household items can be used for more than one tool.)
Digging Deeper
Repurposing is another way of saying “reusing”. It is also sometimes called “upcycling,” because it is even higher in value than recycling.
Check out this video on how to make more seedling and plant holders out of household items!
https://www.youtube.com/watch?v=mIHUmHnLz5g
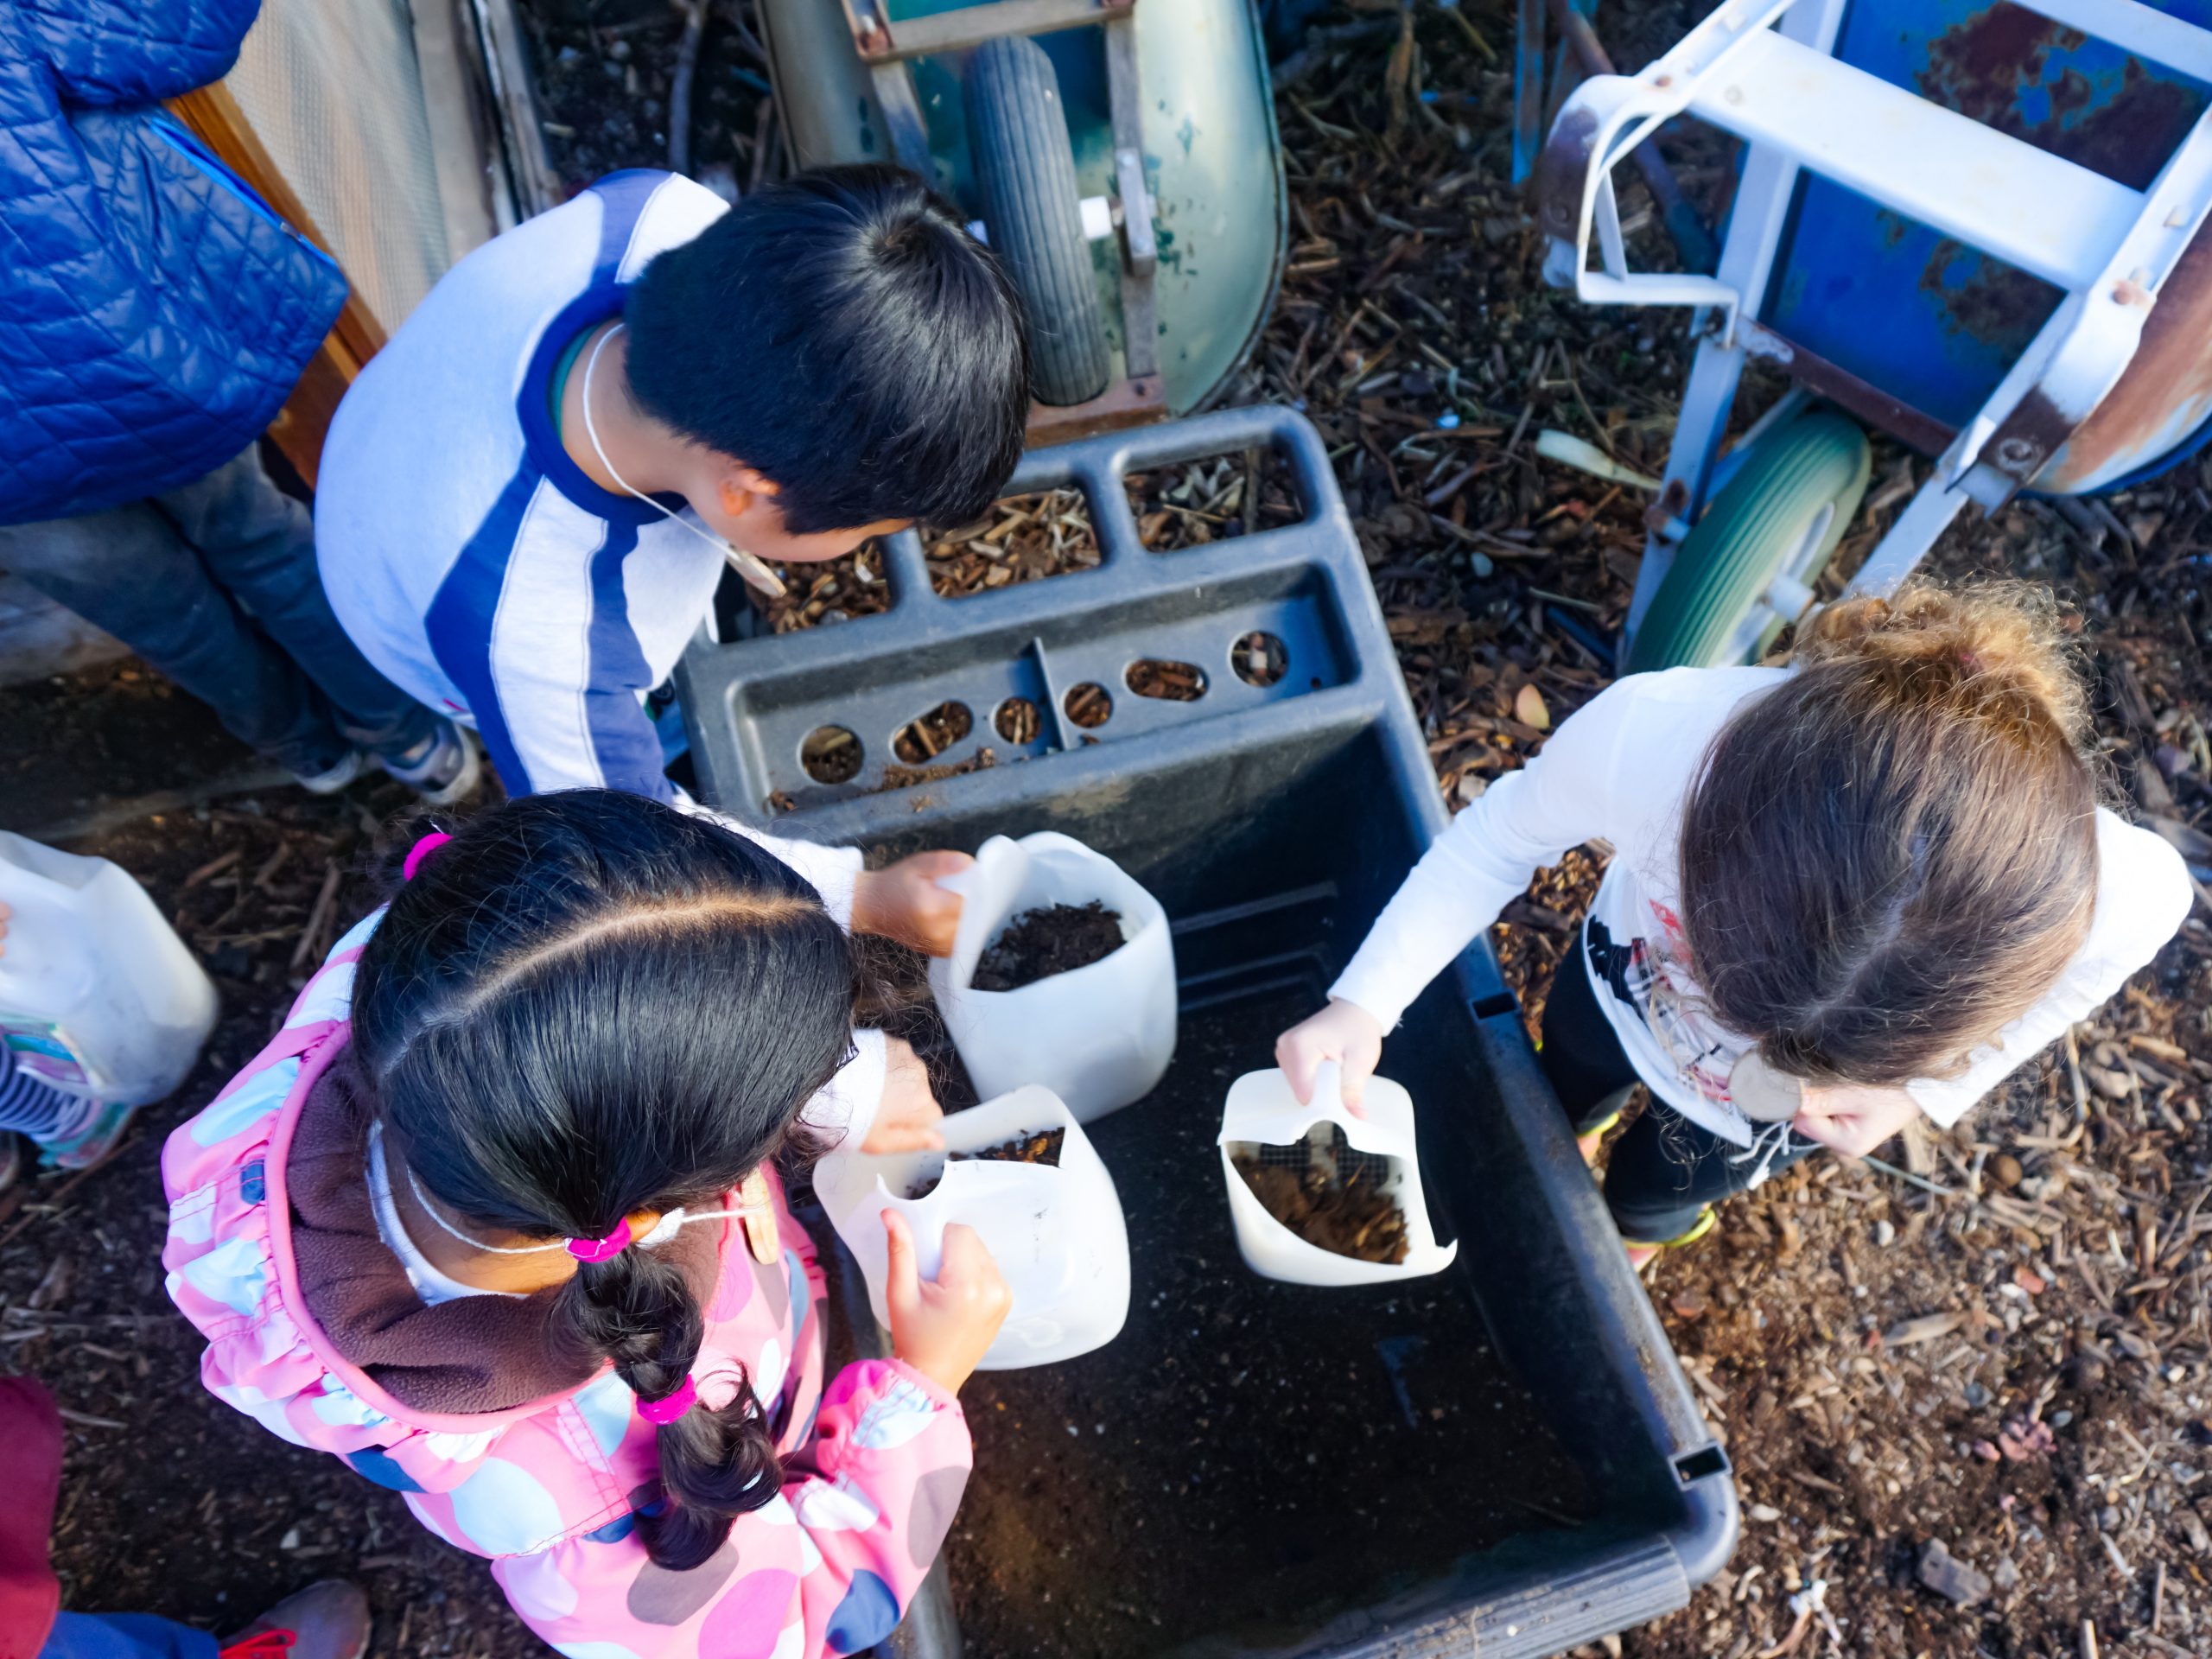
Find it: try to find all the reused items in this picture! Fun Fact: The photo was taken at Hidden Villa’s education garden.
Try It
A) Instead of composting or recycling your old egg carton, here are a few fun ways to give that container a new life! A) Make a caterpillar friend! Here is what you will need:
- Egg carton
- Scissors
- Pipe cleaners
- Googly-eyes (optional)
- Paint/markers/stickers whatever you want to use to decorate!
Cut the carton lengthwise. There should be six bumps to your caterpillar. Each carton will allow you to make two! Next, get creative and color your caterpillar. Use whatever art supplies you have at home. Cut a pipe cleaner in half. Curl the ends of the pipe cleaners and place them in the top of the egg carton on the side you chose to make into the head. Add a fun face to your caterpillar (now is a great time for googly eyes!)
B) Create your own egg carton garden! Give delicate seeds a head start by planting them in an old egg carton instead of directly in the ground. Your egg carton garden is a great way to add some color and life to your indoor space. Here’s what you will need:
- Empty egg carton
- Packets of seeds of your choice
- Potting soil and compost (if you have it). Regular dirt might also work, but not as well (that’s why we compost!)
- Watering can (bonus points if it’s made from a reusable item!)
- Compost sifter (optional)
Fill your egg carton with potting soil, then sprinkle some compost on the top if you have it. Each space where an egg used to be should be full of soil. Use your finger and create little holes in the soil. One hole per space should do the trick. Drop a seed or two into each hole and cover them with soil. Give it a good drink of water after the seeds are planted. Water according to the package of seeds: there is normally a recommendation for how often you should give them a drink. Set your egg carton in a windowsill and watch them grow! Once they’re a few inches tall, they can be transferred into an outside garden bed or a larger pot.
C) Try your hand at making an easy-peasy watering can with the help of someone in your household! Find any recyclable item that is plastic and originally held something to drink. This could be a plastic water bottle, juice container, gallon of milk, you name it. With help from an adult, drill or cut holes in the cap of the container. Screw the cap back on and ta-da, you have a brand-new watering can! Fill the bottle with water and squeeze it to distribute the water on your plants. If you make the egg carton garden, a plastic water bottle watering can is its perfect pair!
D) Create your own produce bag out of an old t-shirt! Find an old t-shirt at home that isn’t being worn. With help from an adult at home, flip the shirt inside-out and cut off the sleeves of the shirt. While the shirt is still inside-out, use a needle and thread to sew the bottom hem shut. To do this, start at one end and sew across the bottom of the shirt until you reach the other end. Tie a knot and flip the shirt inside out. The sleeve holes are now handles and the bottom of the shirt is now a place to hold items like produce!
Print out the guide by downloading the PDF